You’ve chosen the tiles, settled on a layout and lined up a contractor. Everything about your shower renovation feels like it’s falling into place. But there’s a step that needs to happen before a single tile goes on the wall, and it’s the one most often skipped by homeowners who’ve never renovated a bathroom before.
That step is waterproofing.
At TT Waterproofing, we’ve spent over nine years helping homeowners across Gauteng get their bathroom renovations right the first time. In this article, you’ll learn why shower waterproofing before tiling is a step you can’t afford to skip, what the correct installation sequence looks like and how it protects your investment for the full lifespan of the renovation.
What Happens When You Tile Without Waterproofing
Tiles on their own are not watertight. Grout lines absorb moisture, and water finds its way through even the smallest gap. Once it gets behind the tiles, it reaches the substrate, that layer of screed, plaster or concrete sitting underneath your tiling.
That’s when things go wrong. The adhesive holding your tiles in place starts to weaken. Tiles loosen. Some lift, others crack. And the substrate itself begins to deteriorate, giving mould and mildew the damp, dark conditions they thrive in.
What started as a bit of water behind one tile can snowball into a full strip-out and redo. We’ve seen it happen on renovations that were barely two years old.
The Correct Installation Sequence
Getting the order right matters more than most homeowners realise. Here’s what the process looks like when it’s done properly.
Step 1: Surface Preparation
Before any waterproofing product touches the surface, the substrate needs to be clean, sound and free of loose material. Cracks get repaired, and the surface is profiled so the membrane bonds properly. Skip this part and the membrane won’t stick the way it should, no matter how carefully you apply it.
Step 2: First Coat of Waterproofing Membrane
A liquid-applied waterproofing membrane goes onto the prepared surface by brush or roller. Every millimetre counts. Even a small missed spot, one you might not notice during application, gives water a way through.
Step 3: Drying Time
Patience matters here. The first coat must cure fully before the second goes on. Applying the next layer too soon traps moisture between the coats and weakens the bond. How long? It depends on the product and conditions, but rushing this stage is one of the most common shortcuts we see on sites.
Step 4: Second Coat
The second coat goes on at right angles to the first. This cross-hatch approach fills in any thin areas left by the first application and builds up a continuous, reliable barrier. There’s a reason two coats are standard practice across the industry.
Step 5: Tile Compatibility Check
Here’s something that catches a lot of homeowners off guard. Not all tiles behave the same way once they’re on the wall. Porous materials like natural stone actually absorb water through the tile face, which means moisture can saturate the tile body over time and lead to cracking, staining or premature failure.
Porcelain and ceramic, on the other hand, resist water absorption and tend to hold up better in wet environments. If you’ve got your heart set on natural stone, an additional sealant or waterproofing layer over the tiling may be needed. Your waterproofing contractor should be assessing this before installation, not after the tiles are already up.
Step 6: Tiling
Only once the membrane has fully cured and been inspected should tiling begin. The tile adhesive bonds to the membrane surface, and because that membrane is intact and properly prepared, the adhesive performs as it should for the full life of the renovation.
Why the Membrane Protects More Than Just the Tiles
A properly applied waterproofing membrane does more than keep tiles stuck to the wall. It’s a barrier between the wet zone and the structural elements behind it.
Water that reaches timber framing causes rot. Moisture sitting against steel reinforcing triggers corrosion. And persistent dampness in hidden cavities? That’s where mould and mildew take hold, affecting indoor air quality in ways that are difficult and expensive to fix once they’ve set in.
The membrane prevents all of this from starting in the first place. It works behind the scenes, quietly, for years.
Common Mistakes That Undermine Shower Waterproofing
Even when waterproofing is part of the renovation plan, a few common mistakes can undo the effort.
Skipping surface preparation is probably the one we encounter most. Applying membrane over dusty, flaking or uneven surfaces leads to poor adhesion. The membrane peels, blisters, and water finds the gaps.
Stopping at one coat. A single coat might look like it’s covered everything, but it rarely provides the consistent thickness you need for long-term protection.
Not going far enough with coverage. Water doesn’t stay neatly inside the shower tray. Splashing, steam, and condensation mean moisture reaches walls, floors and junctions well beyond where you’d expect. The membrane should extend past the wet zone boundaries, not stop right at the edge.
Using the wrong product for the substrate. A membrane formulated for concrete may not bond properly to fibre cement or plaster. Getting the right match takes assessment, not guesswork.
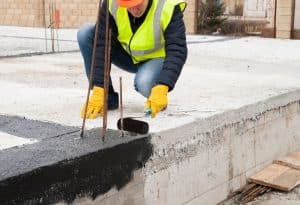
How Professional Installation Makes the Difference
Shower waterproofing is detailed, precise work. The difference between a membrane that lasts 15 years and one that fails in three often comes down to technique, product selection and how carefully the installer handles junctions, corners and pipe penetrations.
At TT Waterproofing, we bring over nine years of hands-on experience to every shower project. We assess the substrate, match the right membrane system to it, and apply it with the kind of care that bathroom environments demand. We want your tile adhesion to last the full lifespan of the renovation, with water staying exactly where it belongs.
FAQ
Do I need waterproofing if I’m using porcelain tiles? Yes, you do. Porcelain tiles resist water absorption, but grout lines don’t. Water still finds its way behind tiles through grout joints, so a waterproofing membrane is essential regardless of tile type.
Can waterproofing be added after tiles are already installed? Sometimes. Topical waterproofing can be applied over existing tiles by removing the grout and replacing it with silicone filler. But it’s a remedial fix, not a first-choice approach. For the best long-term results, waterproofing should always go on before the tiles do.
How long does shower waterproofing take? The application itself often wraps up within a day or two. It’s the drying and curing time between coats that stretches the process to a few days overall. Rushing the timeline only compromises the result.
Get Your Shower Renovation Right From the Start
Proper waterproofing is the foundation of every shower renovation that lasts. It protects the tiles, the walls behind them, the structure underneath and the money you’ve put into the project.
If you’re planning a bathroom renovation or need to sort out waterproofing in an existing shower, get in touch with TT Waterproofing for professional guidance and a solution built to last.